Whilst HYPERISE has been in beta we’ve seen a lot of interesting use cases for hyper personalisation from our early users, who have had massive gains from implementing simple strategies at low cost.
In this post we detail step by step how to implement the growth hack used by ChatWhale, as featured on their own blog, which 3X email click through rates and 6X trial signups.
Spoiler alert! The secret sauce to this email marketing strategy is being able to target personalised ad images to email recipients that simply open the email, without them having to click on a call to action. (We’ll show you exactly how to do this.)
During beta we’ve seen this broadly have a 5X impact on the audience opportunity to engage with personalised ads.
Yes, ok, we’re biased, we think hyper personalisation rocks, but we’re not alone.
Hubspot, Mckinsey and many other established marketing sages unicorns are saying it too.
A recent 6 month study by Hubspot of over 330,000 calls to action saw a 202% uplift in conversions when hyper personalisation was used.
The strategy of leveraging hyper personalisation has been a marketing dream since before the movie Minority Report (2002) glorified it in its ultimate conclusion.
With the HYPERISE toolkit we can take a step closer for B2B marketers, hyper personalising the whole prospect journey from cold email through to sales funnel, at scale.
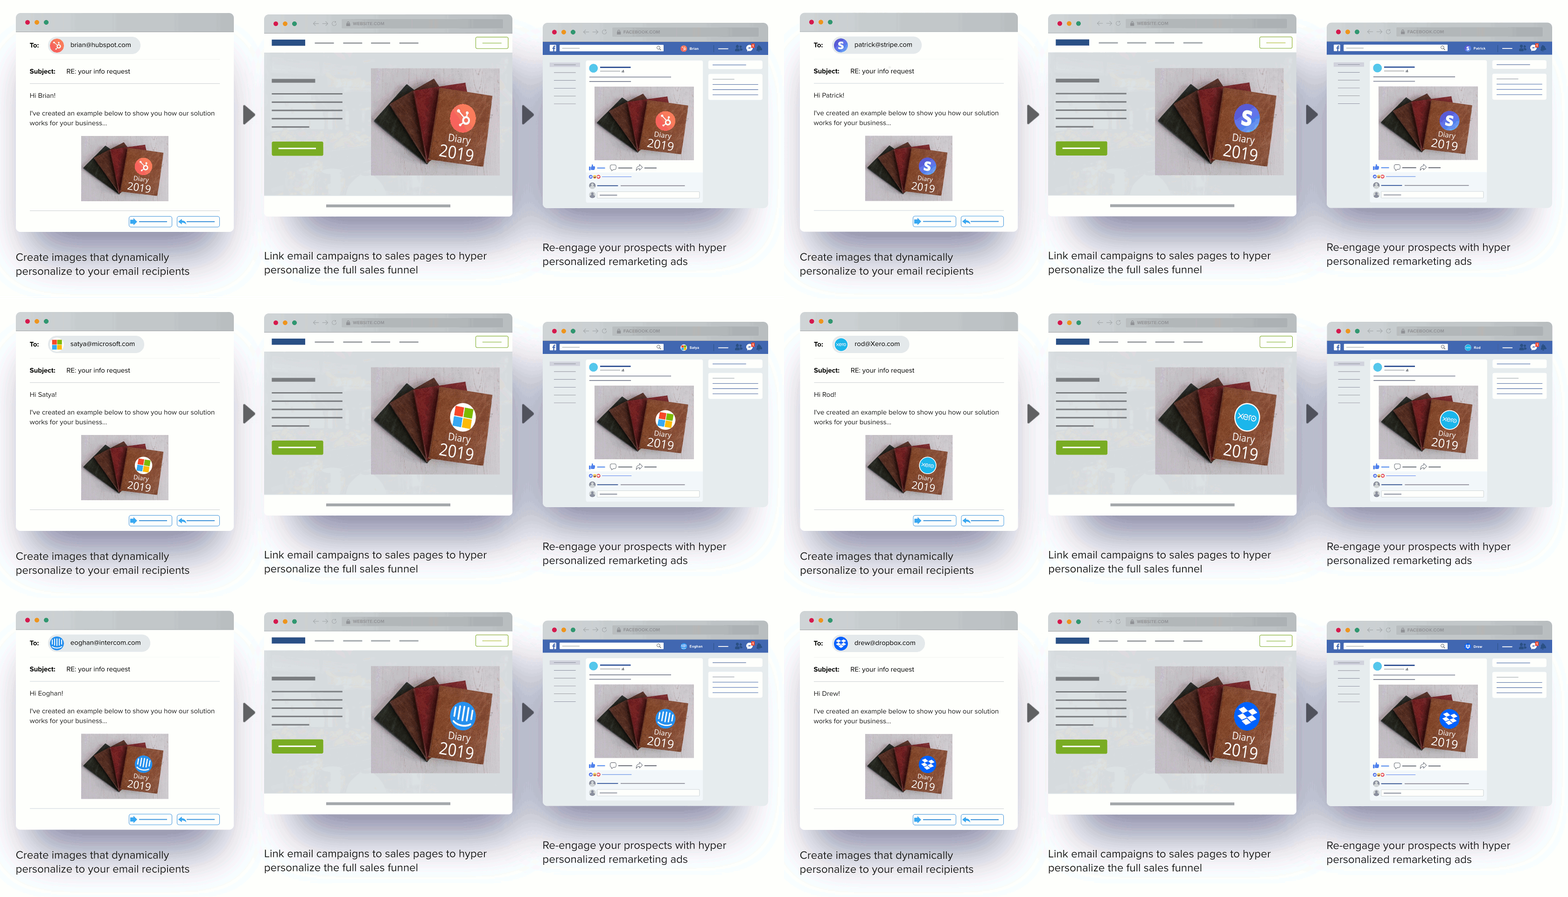
The hack skinny:
We love using simple cloud tools to get the job done effectively and it doesn’t get much simpler than Google Sheets and YAMM! Read on for the step by step guide to smash your B2B cold email conversions.
6X Your Cold Email Signups
STEP ONE: Get an email prospect list and whack it in Google Sheets
As you’re reading this guide you don’t need me to tell you where to get prospect data from, especially if you’re a B2B marketer. It’s everywhere, LinkedIn, Google, Facebook and with so many good scraping services (looking at you Phantombuster) data is not a problem needing solved here.
So bang some of that lovely prospect data in a Google Sheet. Better yet, Make a copy of this example Sheet that we use in this breakdown and bang some lovely prospect data into the ‘data’ tab.
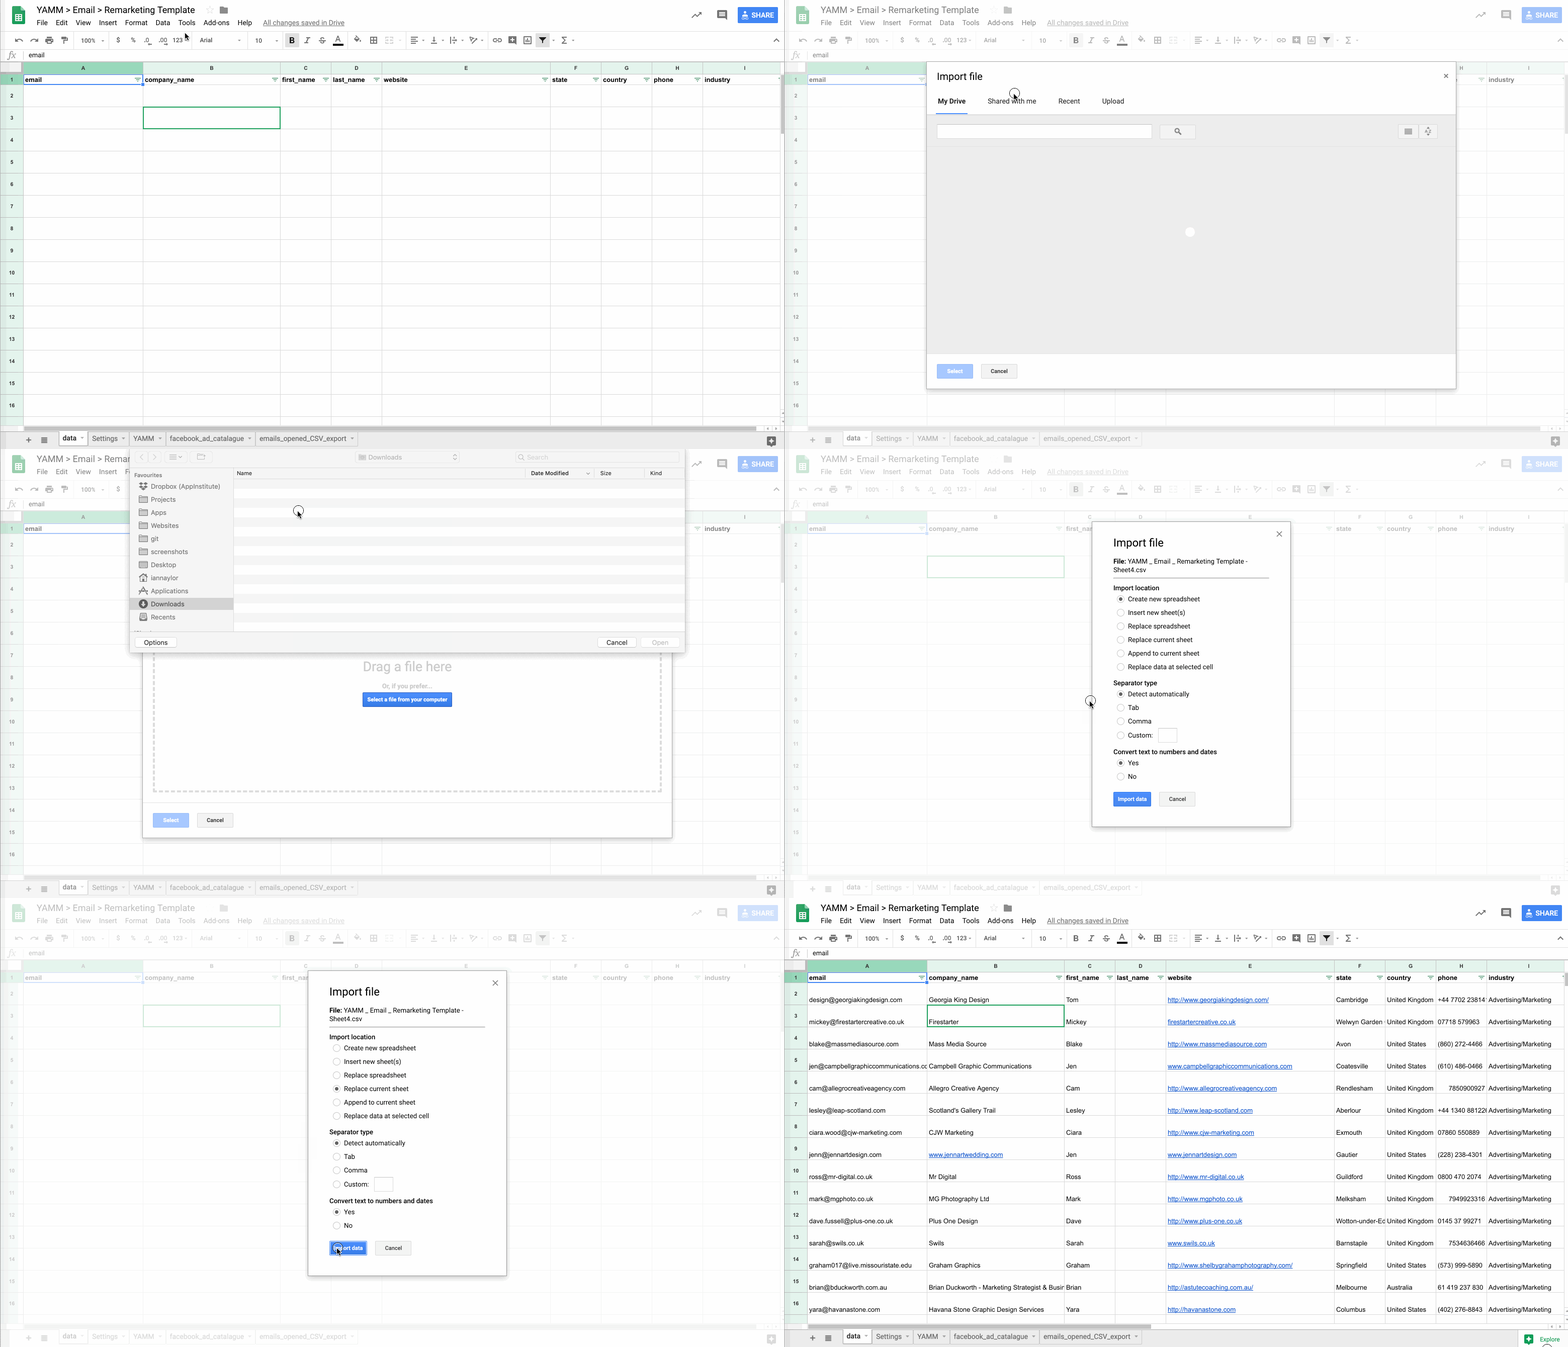
The key to personalisation is to have as much data as possible on your prospects, as a bare minimum you’re going to need the prospects email.
The prospects full name, profile image, location, company, logo and much more can be deduced from an email using data enrichment services.
Now let’s jog on to step two.
STEP TWO: Create a hyper personalised image for the cold outreach campaign
If you haven’t signed up already, now’s a good time to signup for a HYPERISE account, it’s free and you’ll be able to create personalised image templates, such as the ones we’re using in this breakdown.
Now this is the bit where we get to use our creative brain, to see the opportunity to create a dynamic image that we can customise in a purposeful way, that tells a story and speaks to the recipient.
Looking at ChatWhale as an example, on their sales site they have a hero image which demonstrates their product, which is a perfect contender to be personalised.
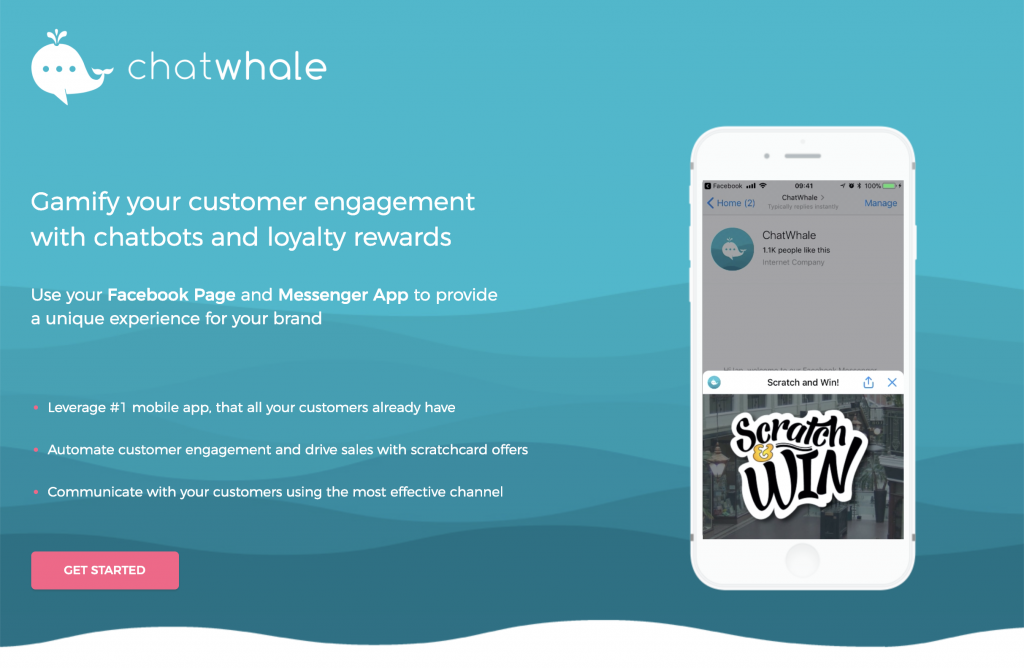
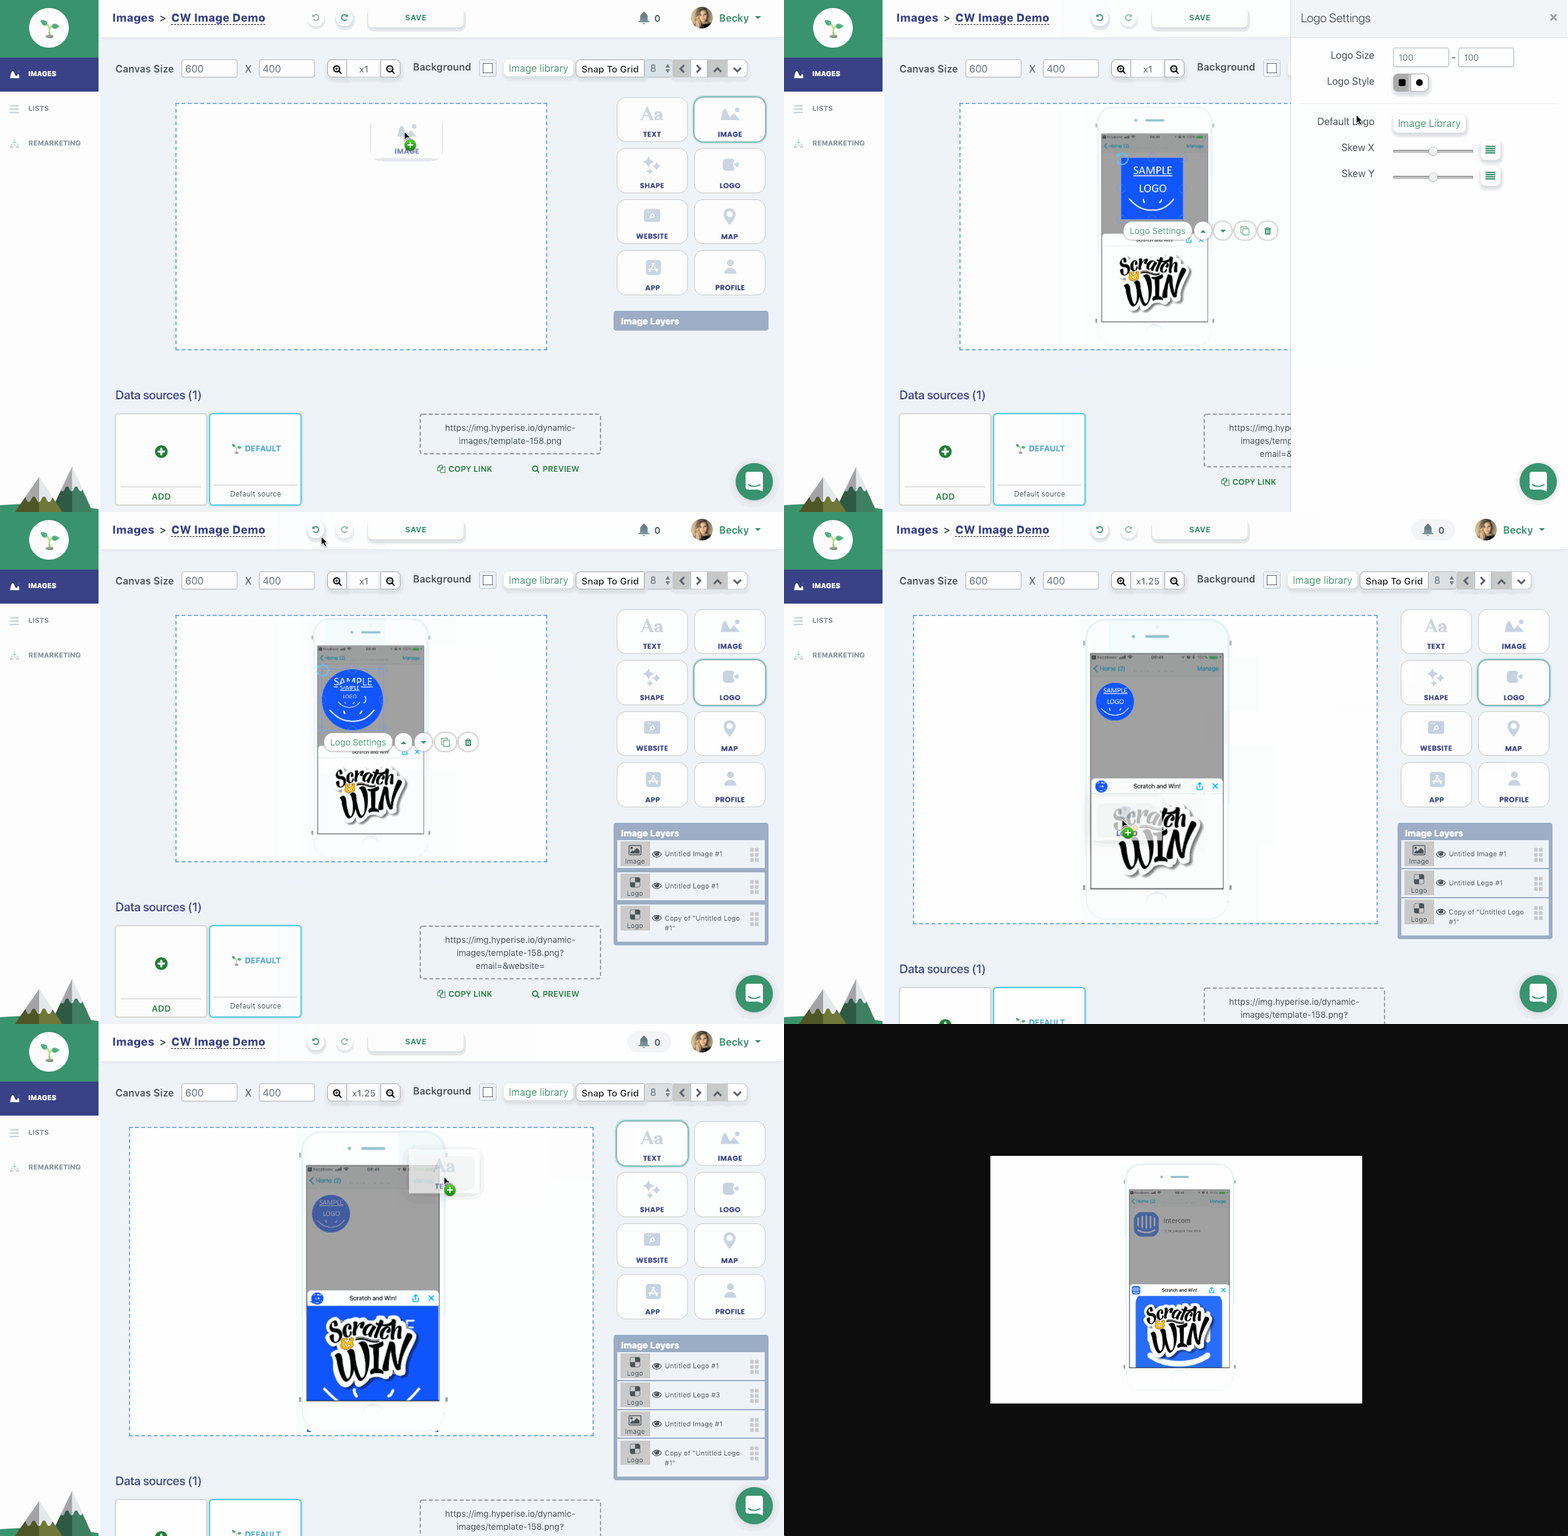
Below we recreate the ChatWhale personalised image that demonstrates to the email recipients how the scratch card looks in their own Facebook Messenger, with their own branding.
We do this by taking a boiler plate product image and add in dynamic business name and logo layers to the image template:
Here’s some examples of what the final images in the emails will look like.
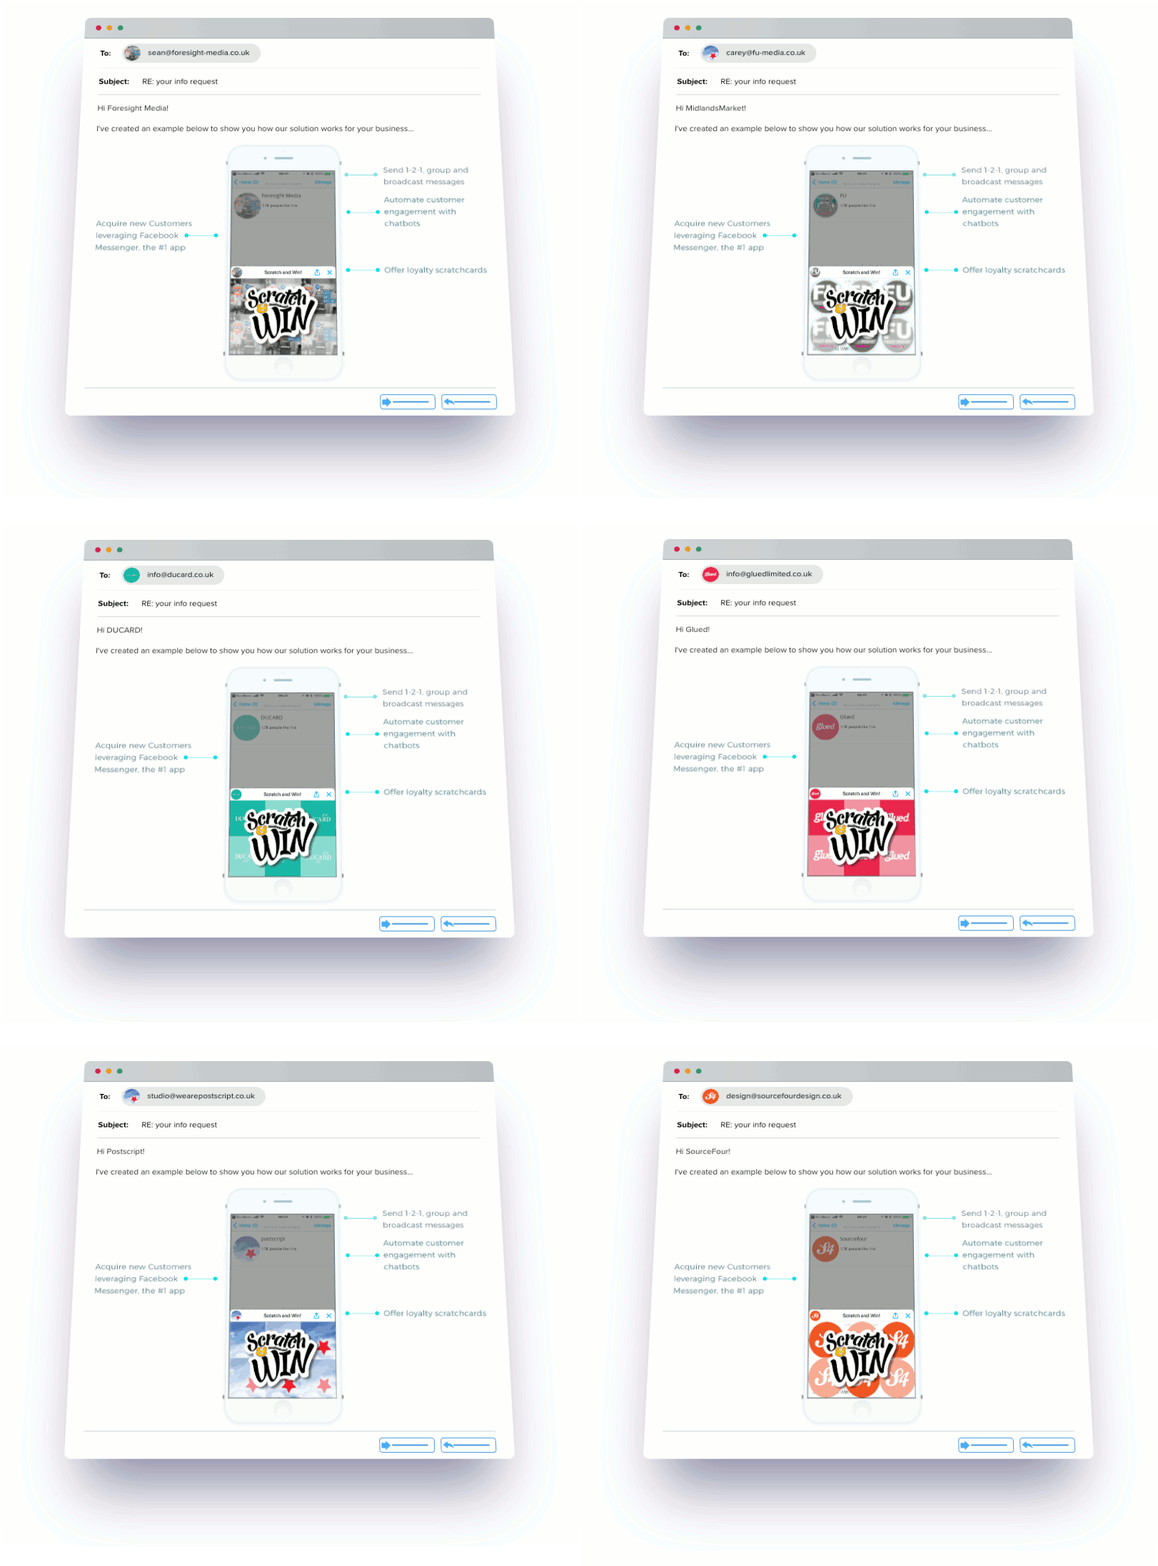
They’re small subtle changes to the image, but they cause a pattern interrupt with the prospect, because of the familiarity, giving you more of the recipients attention to sell your value and so increasing CTR. (202% according to Hubspot 🤓)
With HYPERISE we can personalise images with dynamic layers including profile images, business logos, website and app screenshots, maps with prospects location pinned, as well as dynamic text elements.
Here are some other examples of what you can do:
 | Enrich prospect emails to get the company and location details, so you can send cheeky meeting requests 🙊 |
This product image has 8 points of personalisation, using:
|  |
 | Use company website screenshots to highlight web add-on services. |
Once we’ve created our personalised image template, we can add the Google Sheet, which contains all our prospects, as a data source for the image:
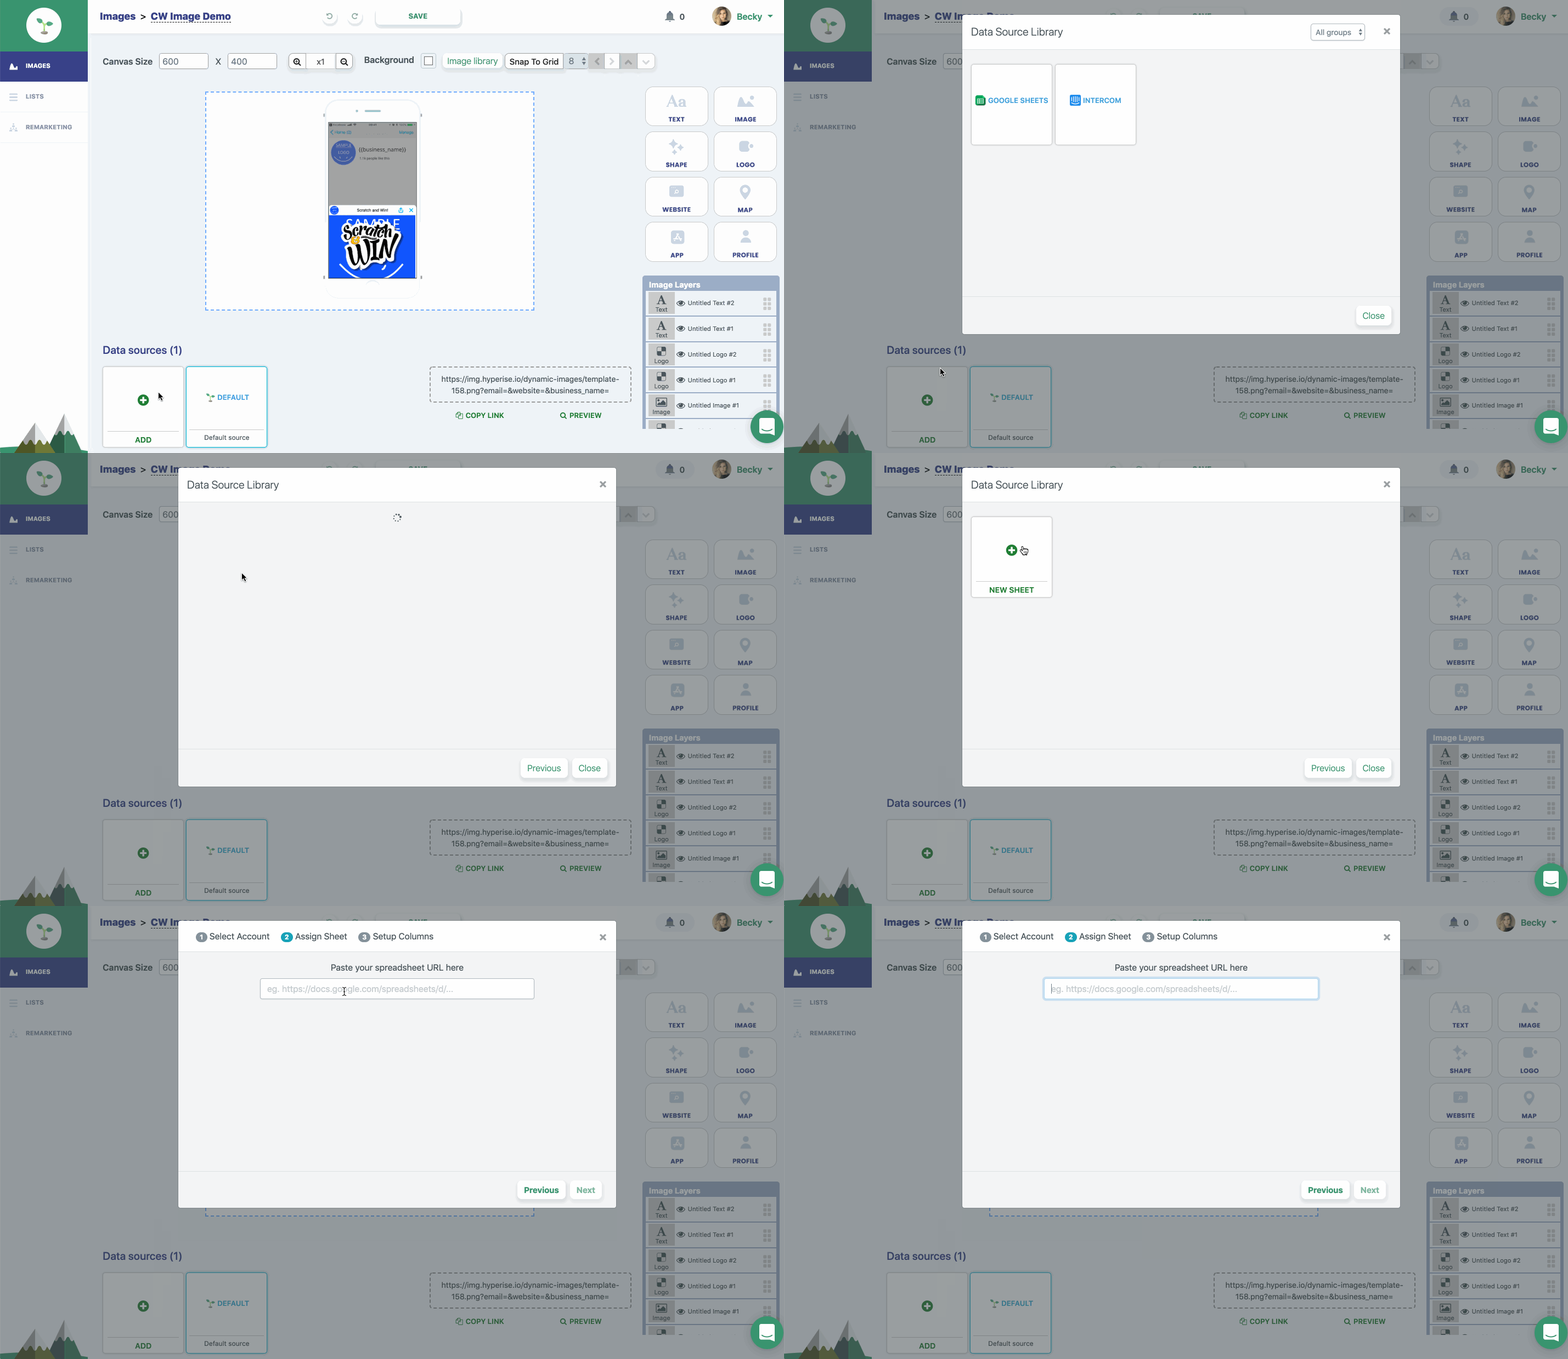
1. Click the Add button in ‘Data Sources’ of your image template
2. Select Google Sheets and then New Sheet
3. Paste in the URL of your Sheet

Your image is now connected to your Sheet, to use as a data source, to create personalised images.
We now need to update the Google Sheet with the image being used.

1. Click to select the Google Sheet data source for your image
2. Click Copy Link to, well copy the image link 🙂
Now we have the image URL copied, we can update our Sheet:
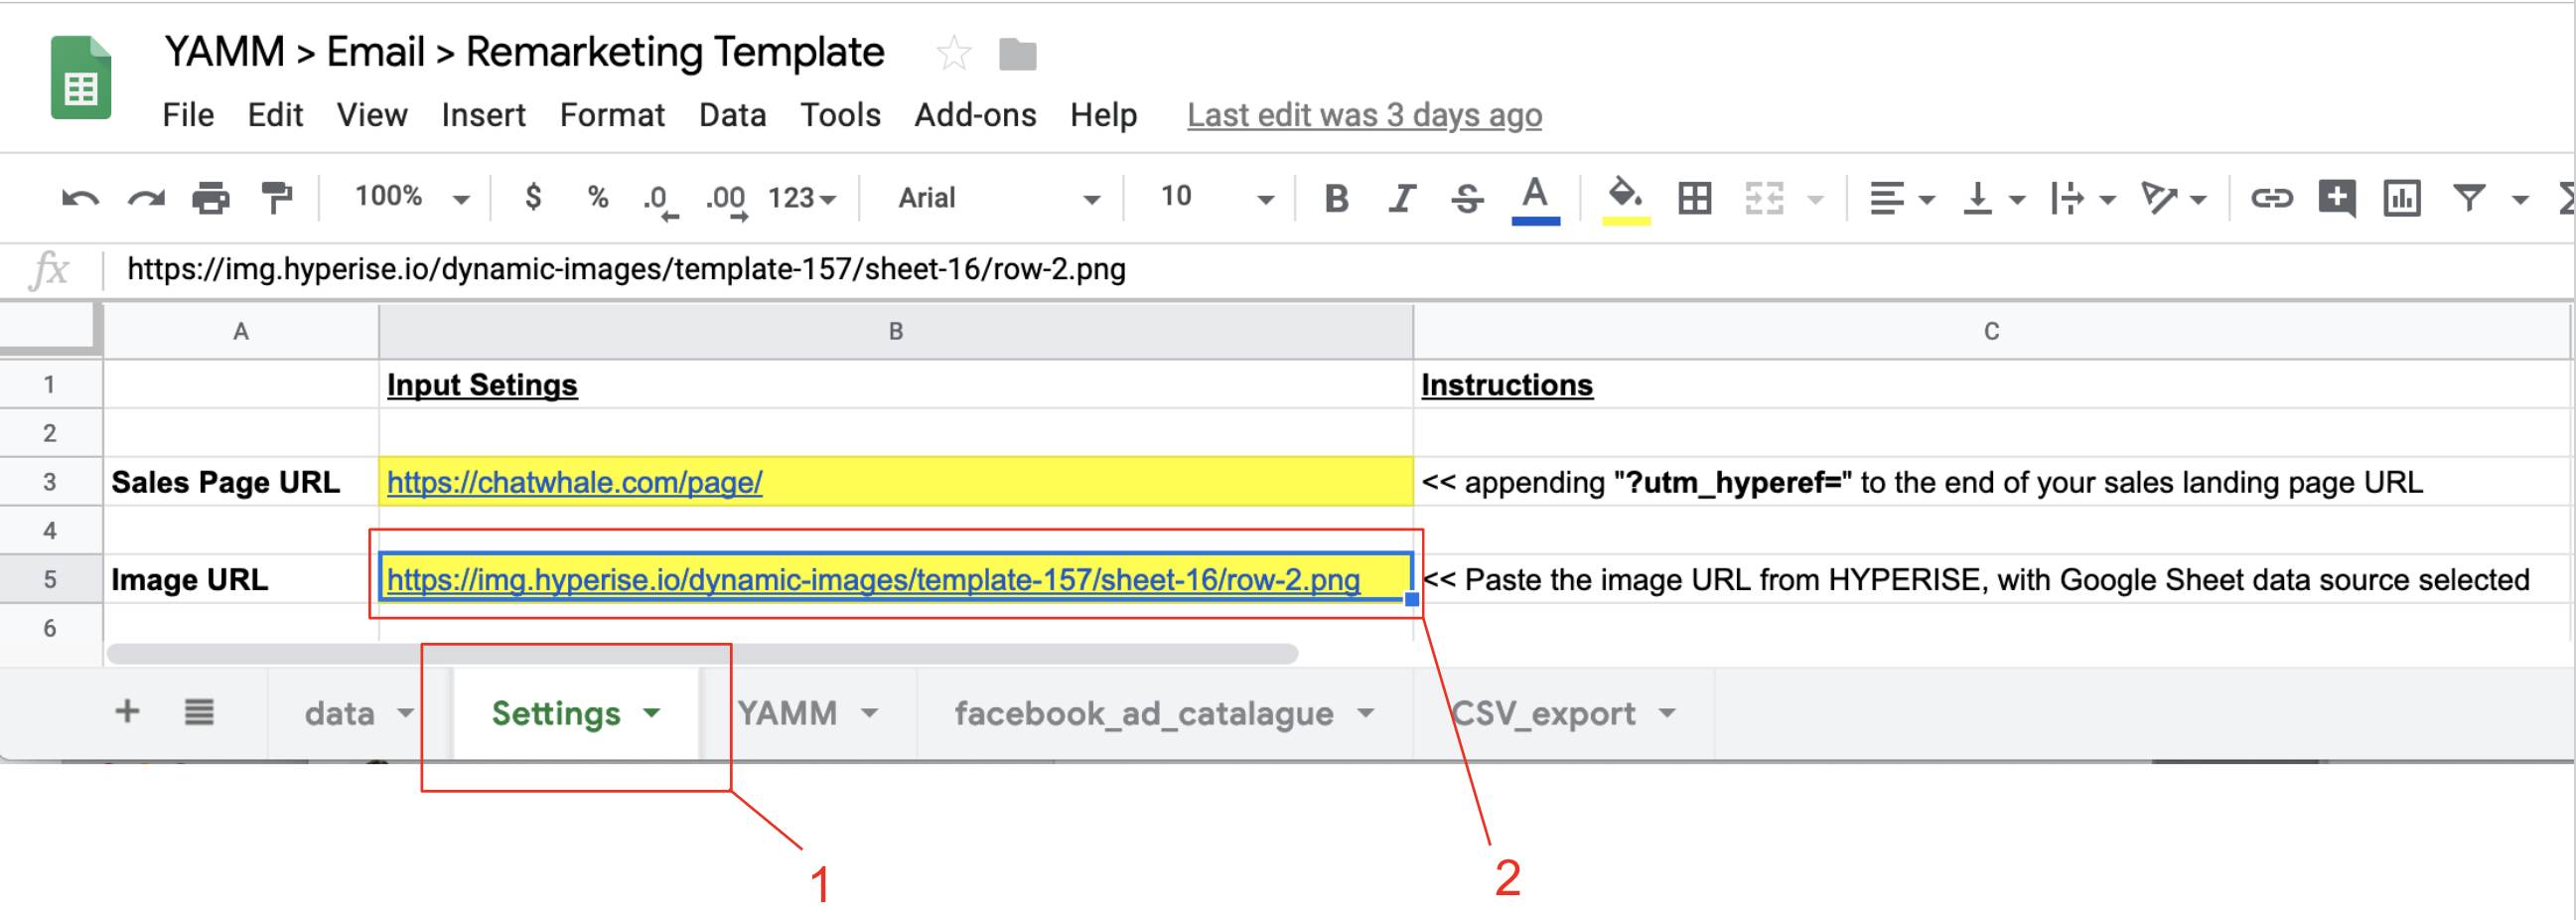
1. Click ‘Settings’ tab
2. Paste into the Image URL yellow field
The Sheet and YAMM email campaign will now use this image template in your emails and sales page visitors, personalised for each prospect.
STEP THREE: Set-up sales page with personalised image
If you have existing sales channels, you’ll already have tried and tested sales landing pages or funnels, so it makes sense that you take a copy of those and update with a personalised image and tracking.
If you don’t have an existing sales page and you need to create one, we like LeadPages for quick sales page creation, but what really counts is the content on the page, not the tool you use to build the page.
Whatever your preference the following steps will still be applicable.
First we need to add the HTML image snippet to your sales page, where you want the personalised image to be displayed.
Here’s how you do it.
We can define personalisation on your existing website, totally code free using the hyperise website personalisation toolbar.
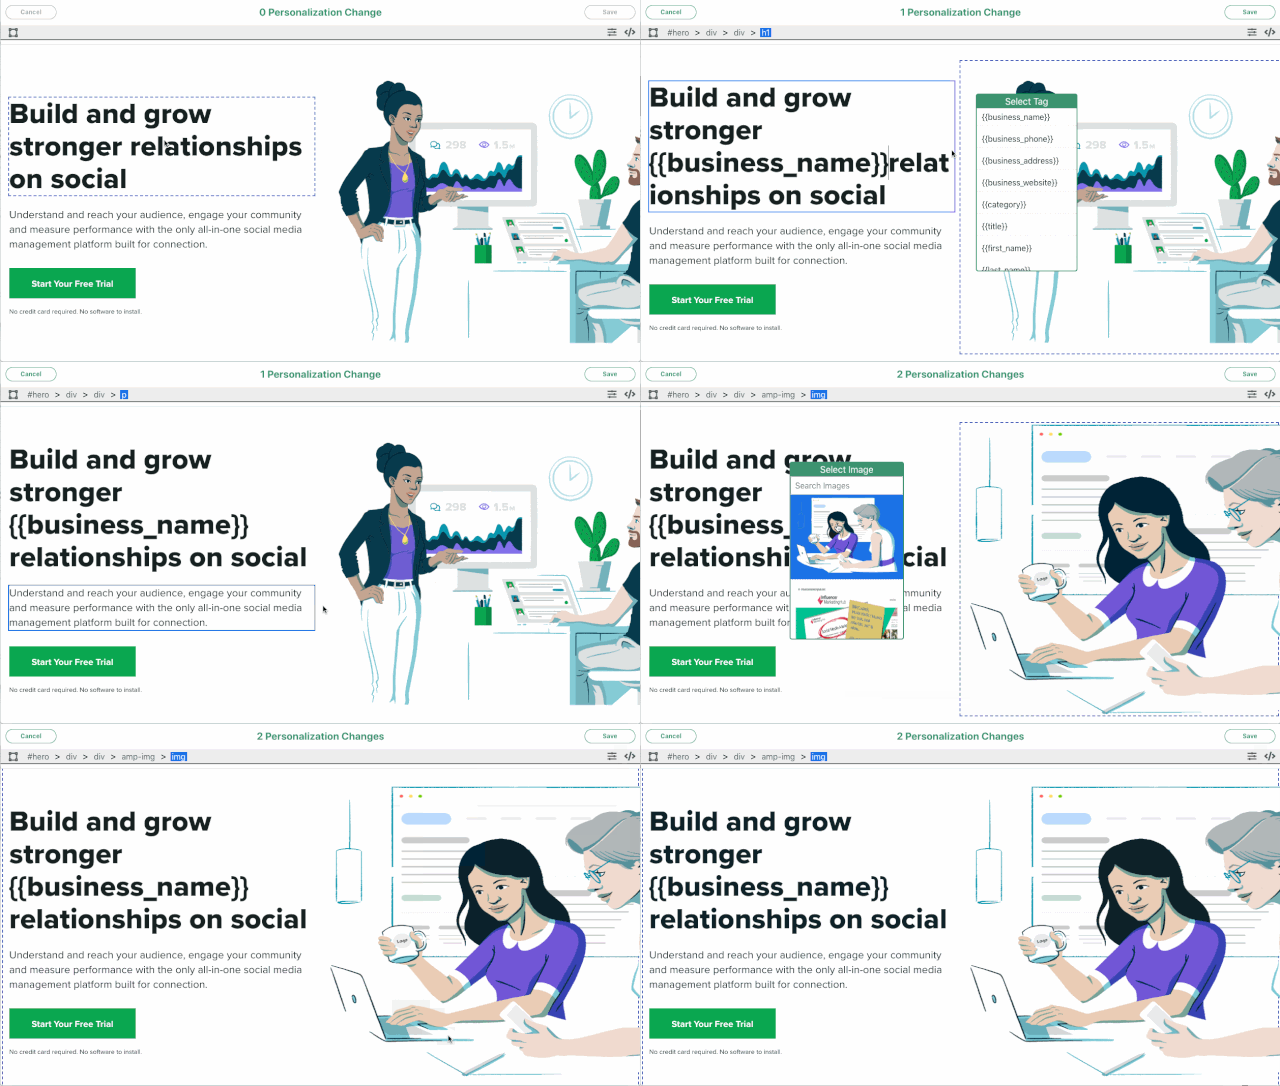
If you have an existing product/explainer image on your sales page, as with the ChatWhale example, this makes a perfect candidate to be replaced.
Next we add the Javascript snippet to your sales page, this will look for the utm_hyperef tag from the links in your emails and update the image on the sales page to a hyper personalised one. This needs to be placed below the image we’ve added, ideally just before the </BODY> tag.
You can get your Javascript snippet from the websites section of your Hyperise account.
STEP FOUR: Use YAMM to bang out the emails
If you haven’t used YAMM before, it’s a plugin for Google Sheets and Gmail/G Suite that allows you to send bulk email really simply. Check out this awesome YAMM setup guide for first timers.
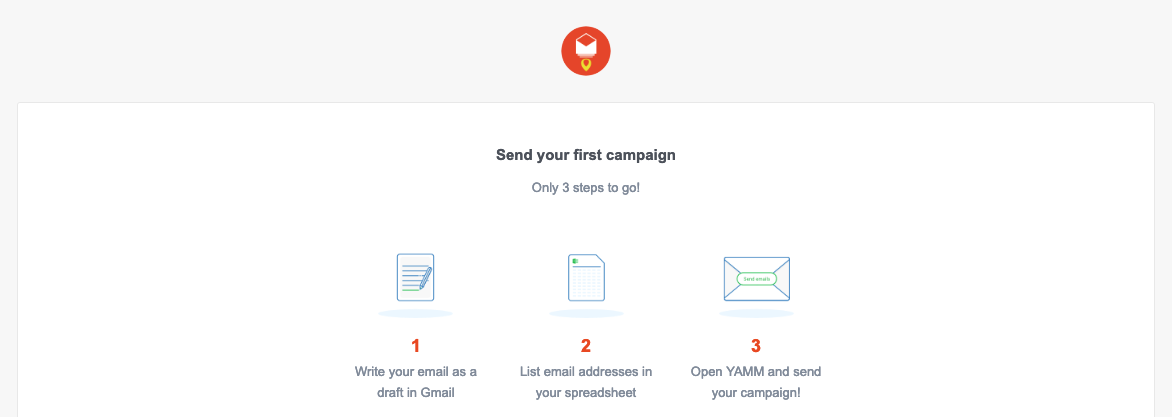
Now lets create the email template.
Go to your Gmail/G Suite inbox and compose a new email.
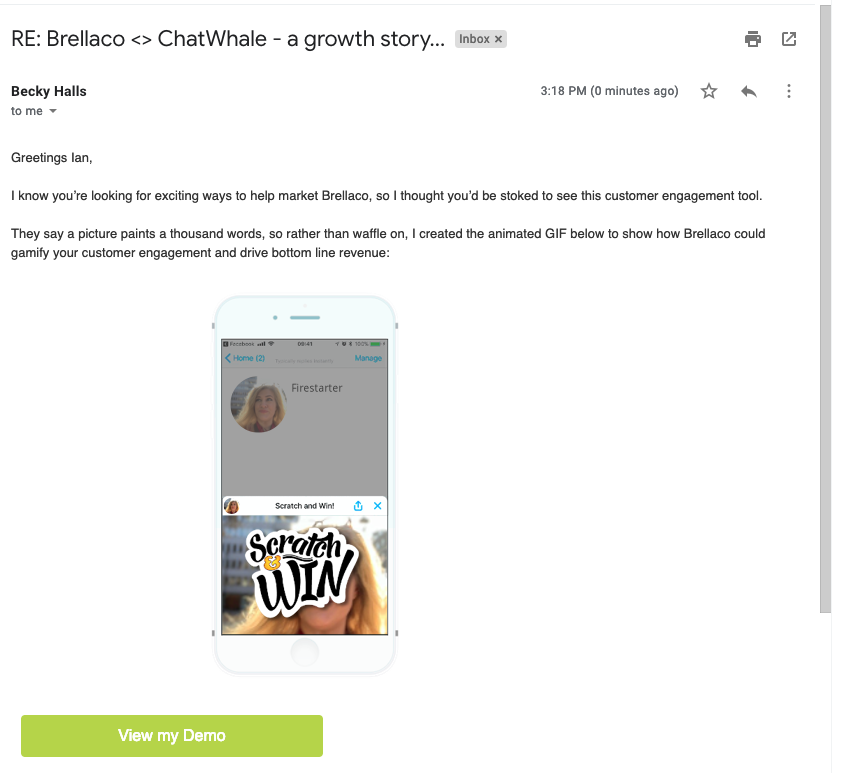
In our following example, we’re sending a cold email for ChatWhale, that includes a brief introduction paragraph, personalised image, call to action button and tracking pixel.
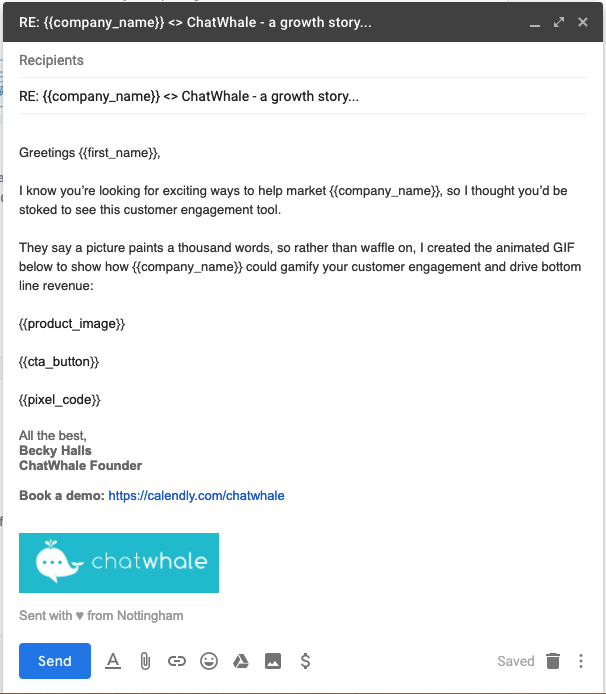
We added five markers to the email, to personalise with data from the Sheet:
| MARKER | DESCRIPTION |
| {{first_name}} | prospects first name |
| {{company_name}} | name of company prospect works at |
| {{product_image}} | personalised image, linked to sales page |
| {{cta_button}} | call to action button, linked to sales page |
The name inside your marker {{}} must match exactly the column header of your spreadsheet, as YAMM is case sensitive.
If you have a column header called ‘First Name’ with capitals F and N, write exactly {{First Name}} (and not {{First name}}, or {{first NaMe}} etc.):
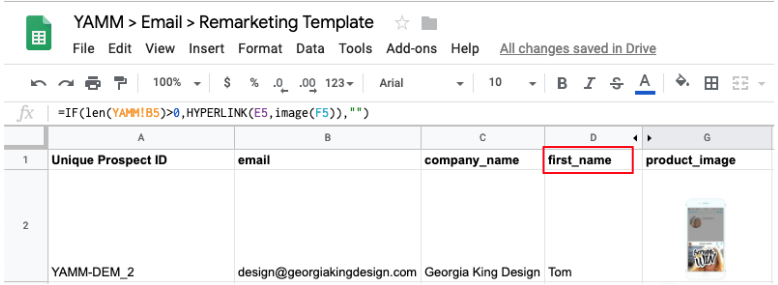
Closing your email before sending, automatically saves it in drafts.

YAMM will now be able to select this template for your cold email campaign.
Go back to your spreadsheet, and click Add-ons > Yet Another Mail Merge > Start Mail Merge:

Once done, enter your Sender Name and choose your Gmail draft. Then click ‘Send mails’ to start your mail merge:
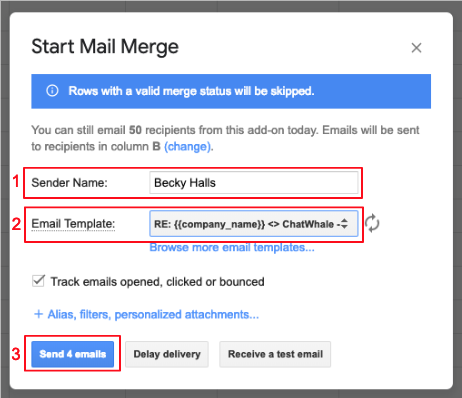
Once you click ‘Send mails’, it is not possible to cancel your mail merge delivery. So please be careful to double check your campaign (draft, recipient list, data etc.) before sending your email.
A progress bar will appear, so that you know in real-time the exact number of emails being sent by YAMM:
At the end of your mail merge, you’ll see a confirmation window summarizing the total number of emails sent:
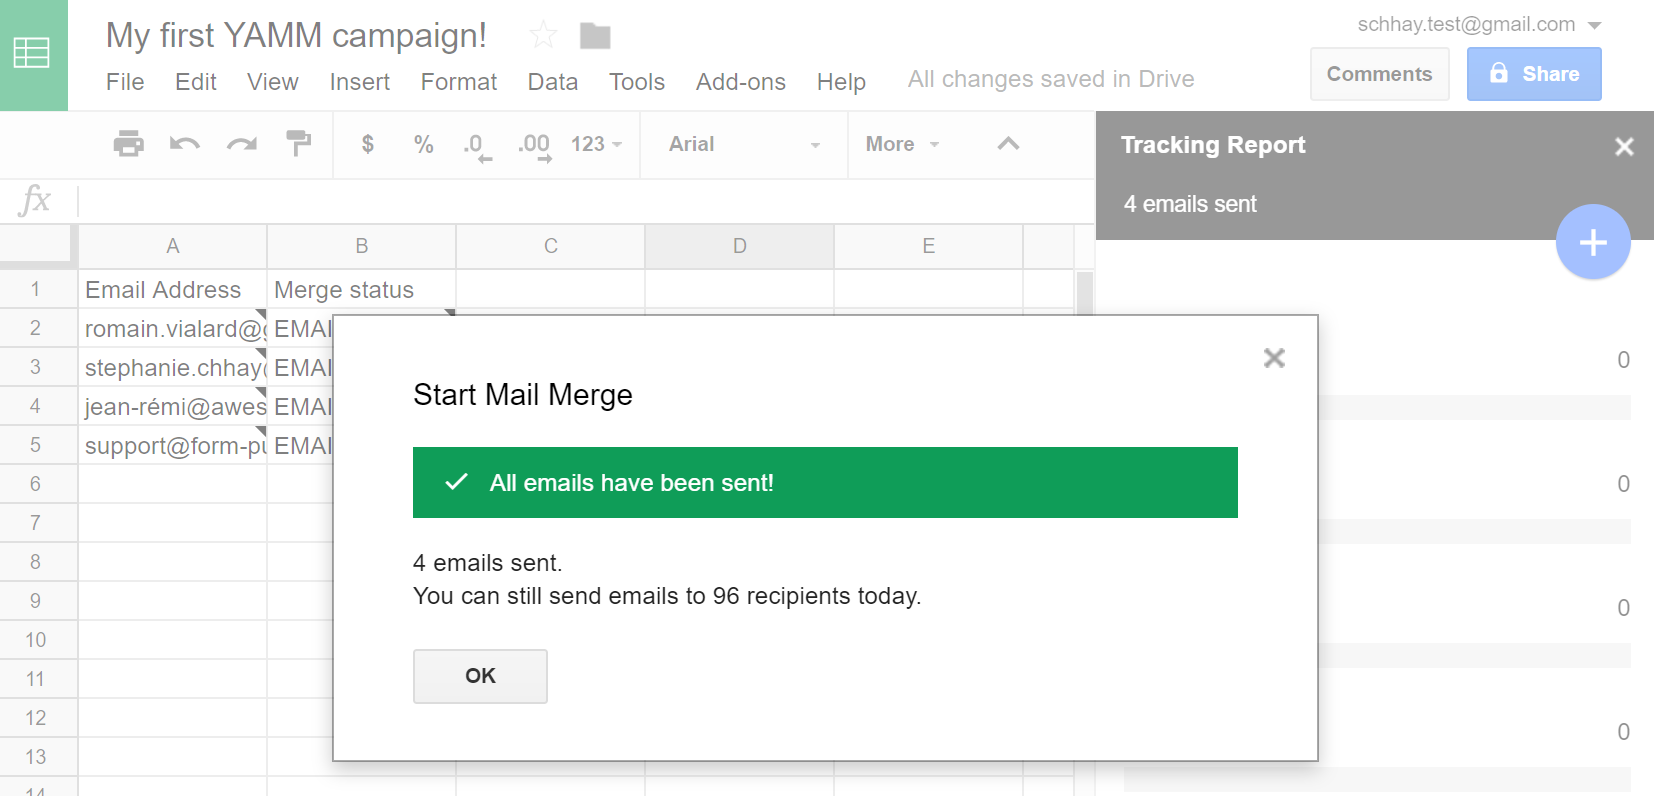
Congratulations! You have now successfully sent your first campaign with YAMM. Here’s an example of what your recipients will receive in their inbox:
Pro Tip. We recommend setting up a separate email address for campaigns, so your personal email reputation isn’t effected and your inbox doesn’t get filled with OOO emails.
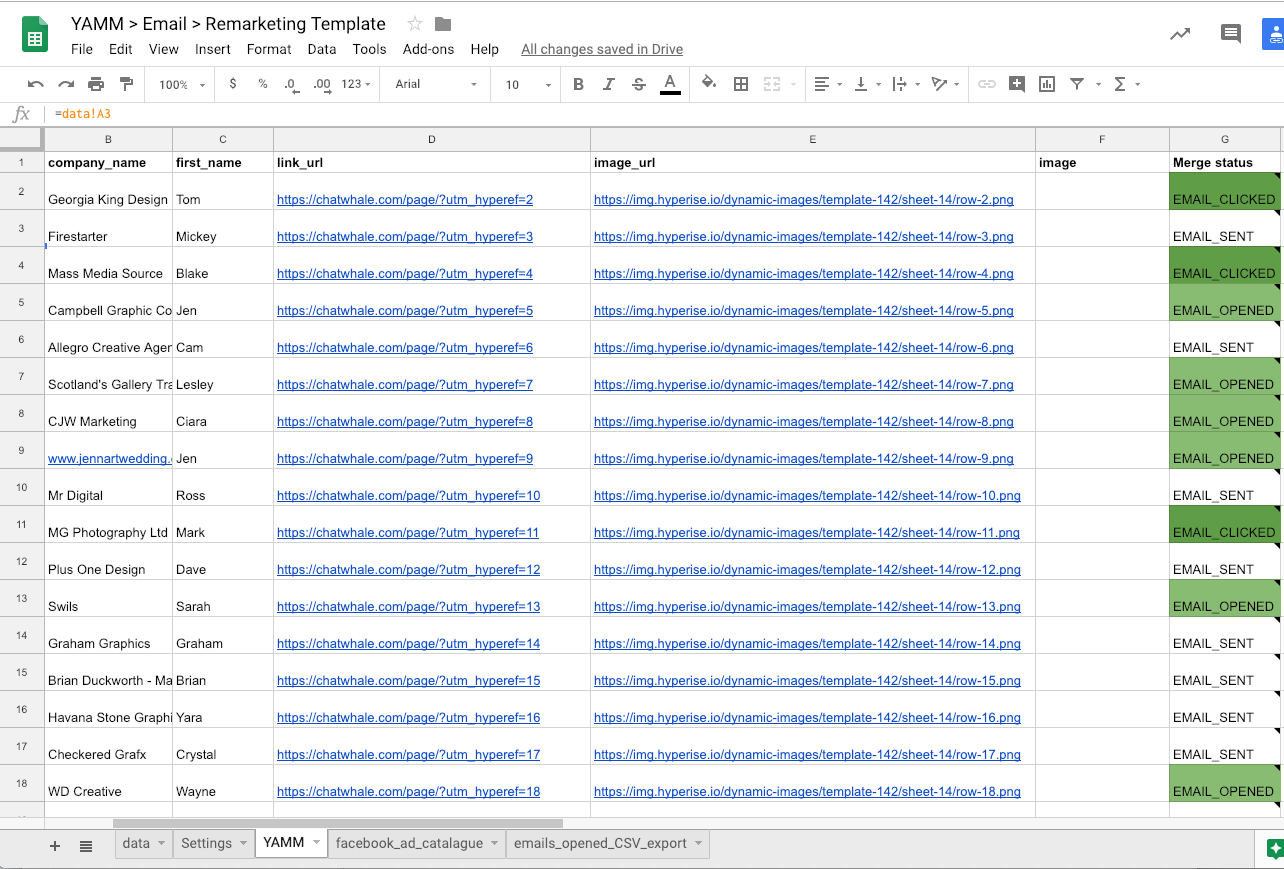
Once your email campaign has been sent, you’ll see the ‘Merge status’ column in the Sheet update as the recipients respond to your emails.
Wrap-up
So that’s it, with a handful of data and a bunch of cloud services (Sheets, YAMM, G Suite & HYPERISE) we’re able to get insane results from cold B2B email marketing.
In the case of ChatWhale they achieved 3X email click through rates and 6X trial signups.
We’d love you to be our next case study, are you ready to grow your conversions?
If so let’s talk, get your free trial started and let us setup your first campaign.
As always happy hacking, here’s to your success.
Last Updated on October 20, 2021 by Ian Naylor