Navigating mass emailing in Gmail can sometimes feel like a minefield. Maybe you’re not sure about the best methods to reach a broad audience, or perhaps you’re frustrated by emails consistently landing in spam folders.
The challenge isn’t just sending out a large volume of emails but ensuring they’re seen, read, and acted upon. If they end up overlooked in the “Promotions” tab, or worse, the dreaded spam folder, then your message is lost.
So, how do you effectively send mass emails in Gmail and ensure they resonate with your audience? Furthermore, what are the best practices to dodge those pesky spam filters? In this comprehensive guide, we’ll offer clear strategies to enhance your mass email game.
Ready to elevate your outreach? Let’s get started!
What Is a Mass Email?
A mass email, also referred to as a bulk email, is a type of electronic mail that is sent to a large group of recipients at once.
Instead of sending an individual email message to each recipient, the sender uses mass emailing software or services to send the same message to a large number of people.
Mass email campaigns are commonly used for marketing messaging, promotions, newsletters, event announcements, and other purposes where a message needs to be communicated to a broad audience.
Some key points about mass emails include:
Opt-in
Legitimate mass emails are usually sent to recipients who have “opted in” or given permission to be contacted. Adhering to anti-spam laws and regulations is critical.
Personalization
Many mass email tools allow for personalization, which means that although the bulk of the content is the same for every recipient, specific parts (like the recipient’s name) can be customized. More on this below!
Unsubscribe option
Most countries have regulations that mandate the inclusion of an easy way for recipients to unsubscribe or opt out of future emails. This ensures recipients have control over the emails they receive.
Potential for abuse
Due to its efficiency in reaching a large audience quickly, email is often exploited by spammers. This has led to the development and implementation of anti-spam laws, rules, and filtering mechanisms by email service providers to protect users.
It’s worth noting that if someone is considering sending mass emails, it’s crucial to be aware of and compliant with all relevant laws and best practices. This ensures that emails are not flagged as spam and that they maintain a good reputation among their recipients.
The Benefits of Gmail for Sending Mass Emails
If you’re considering using Gmail for sending mass messages, here are some of the benefits:
✔️ Reliability: Gmail, a Google service, offers dependable email delivery.
✔️ High deliverability: Emails sent from Gmail have a good chance of landing in the recipient’s primary inbox and avoiding the spam folder, especially if you’re not sending emails out to too many recipients simultaneously.
✔️ User-friendly interface: Gmail’s interface is intuitive, which makes it easy to compose, format, and send emails.
✔️ Integration with Google Services: If you’re already using other Google services, Gmail seamlessly integrates with them, which makes tasks like attaching files from Drive or picking contacts for your email more straightforward.
✔️ Organization features: Gmail’s system of labels and filters can be beneficial for segmenting and organizing your email campaign. For instance, you can filter responses from your mass email with a specific label for easier tracking.
✔️ Cost-effective: For users on the free version of Gmail, sending mass emails won’t incur additional costs, though sending limits apply. G Suite (now known as Google Workspace) users get added benefits and increased sending limits, but at a subscription cost.
✔️Secure: Gmail has strong security measures to safeguard your account.
✔️Extensions: Numerous third-party extensions are available for Gmail, which enhance its capabilities for sending mass emails, tracking options, and creating mass personalized emails.
The Three Ways to Send a Mass Email in Gmail
1️⃣ The BCC method
Using the BCC (blind carbon copy) method to send mass emails ensures that each recipient only sees their email address and not those of the entire list of recipients. Here’s a step-by-step guide to sending mass emails by using the BCC method in Gmail:
1. Prepare your email list
Ensure you have a list of all the email addresses you want to send the email to. It’s often easiest to create your list in a Google Sheet or text document to quickly copy all the addresses.
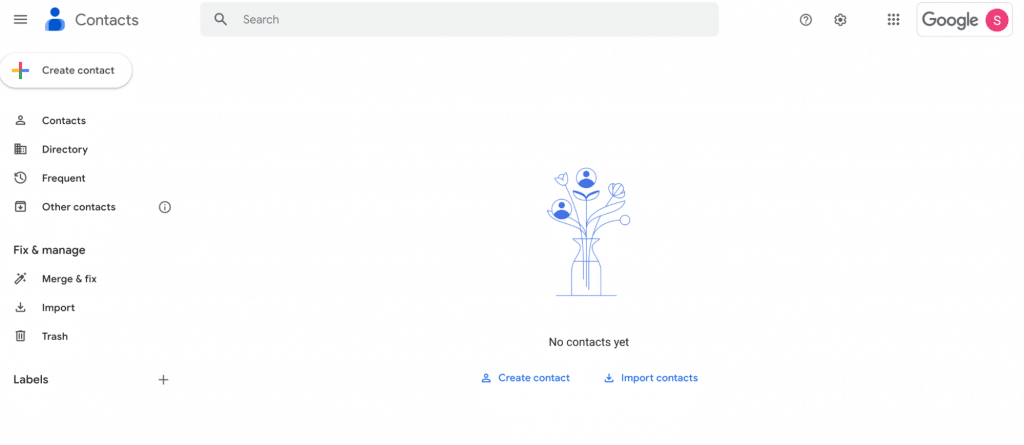
Next, add the email addresses of your multiple recipients to Google Contacts. Here’s how:
- Open Gmail and click on the Google Apps icon (grid icon) in the top right corner.
- Select “Contacts” from the dropdown.
- On the Contacts page, click on the “Create contact” button.
- Enter the person’s name, email address, and any other information you want to include.
- Click “Save” to add the contact.
- Repeat the process for all the contacts you want to add.
ℹ️ If your Gmail contacts are listed in a Google Sheet, you can simply import the file. On the contacts page, simply select “Import” on the left:
2. Create a contact group with the Label feature
- Open Gmail and click on the Google Apps icon (grid icon) on the top right. Select “Contacts” from the dropdown.
- On the Contacts page’s left sidebar, click “Labels.”
- Click on the “Create label” button near the top-left corner.
- A pop-up will appear. Enter a name for your new label (e.g., “Newsletter Subscribers”). This label will serve as your contact group.
- Click on the “Save” button to create your label.
Now, when you view or select any contact, you can add them to your new label by clicking on the “Edit Labels” icon (which resembles a tag) and selecting your desired label from the list.
With your contact list set up, you can now easily send emails to multiple recipients in this group without selecting them individually each time.
3. Compose your bulk emails
In the top left corner, click the “Compose” button to open the compose window.
Next, you will enter your email details:
➡️ Subject: Enter the subject of your email.
➡️ Body: Type the content of your email in the main text box.
Access Settings: In Gmail, click on the gear icon in the upper right and choose “See all settings.”
Navigate to Advanced: Go to the “Advanced” tab.
Enable Templates: Find the “Templates” option and select “Enable.” Save changes and return to your inbox.
Compose an Email: Click “Compose” to create a new email.
Draft Your Email: Write the content that you want to save as a template.
Save as Template: Click on the three dots (More options) at the bottom right corner of the email window. Hover over “Templates.” Then, select “Save draft as template” > “Save as new template.” Name your template.
Using a Saved Template: When composing a new email, click on the three dots (More options) at the bottom. Hover over “Templates” and select the template you want to use from the list. This will auto-fill the content of the email with your saved template.
4. Select your recipients
In the “To” field, you can enter your own email address to get a copy of the email.
Next to the “To” field, you’ll see “Cc” and “Bcc.” Click on “Bcc.”
Once the BCC field appears, copy the email addresses from your list and paste them into the BCC field. You can also search for the name of your label (step 2) to add recipients.
5. Review and send your mass email
Double-check your email’s content, subject, and recipient list to eliminate mistakes. Once you’re ready, click the “Send” button.
Go to Gmail’s “Sent Mail” folder to ensure your email was sent successfully. You should also receive a copy in your inbox since you’ve added your email in the “To” field.
The downsides of the BCC method
This approach is convenient, since you can email multiple recipients straight from your Gmail inbox. There are, however, a few downsides.
❌ Lacks Personalization: BCC emails can appear generic.
❌ Gmail Sending Limits: Free accounts are capped at 500 recipients daily.
❌ Risk of Being Flagged as Spam: This can result in the blacklisting of your email or domain.
❌ No Performance Metrics: No insights like open rates or click-through rates.
❌ Missing Unsubscribe Option: Not offering this can breach some email regulations.
❌ Mistake Potential: Accidentally revealing all recipients if CC is used instead of BCC.
❌ Appears Less Professional: Might not give a polished impression to recipients.
❌ Delivery Uncertainties: No clear alerts on which specific email bounced or failed.
❌ Limited Advanced Features: Lacks tools like segmentation and A/B testing.
In summary, while BCC is okay for quick, small-scale communications, dedicated platforms offer more benefits for larger email campaigns.
2️⃣ Gmail’s built-in mail merge
Google has introduced a new feature in Gmail known as “Mail Merge,” which replaces multi-send. This feature not only lets you send bulk emails directly from your Gmail, but it also allows you to add a personal touch to each.
With the “Mail Merge” feature, you can add tags like @firstname or @lastname in your emails. When you send the email, Gmail then replaces these tags with each recipient’s actual first or last name, which gives the impression of a personal email.
To access and use the “Mail Merge” feature, you need to have one of the following Google Workspace editions:
- Workspace Individual
- Business Standard
- Business Plus
- Enterprise Starter
- Enterprise Standard
- Enterprise Plus
- Education Standard
- Education Plus
If you have Google Workspace, here’s how you set it up.
1. Log in to your Gmail Account
Once you have logged in to your Gmail inbox, hit the “Compose new mail” button to open a new window.
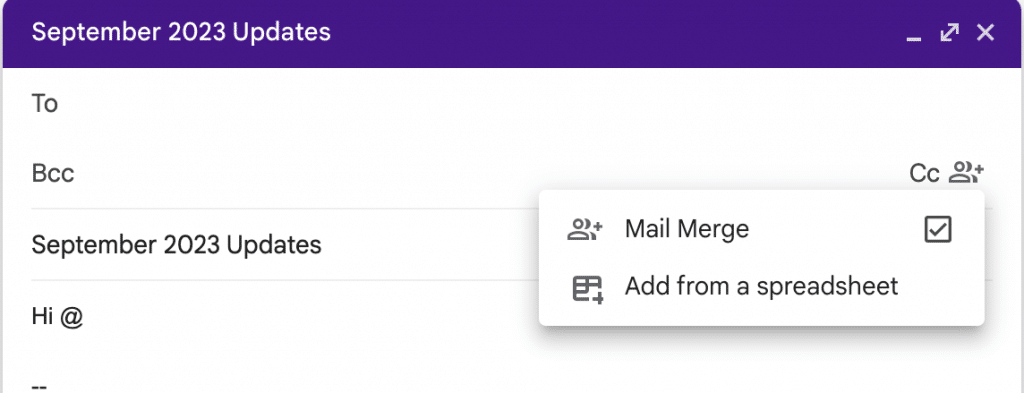
2. Enable the mail merge feature
To turn the feature on, click “use mail merge” in the BCC field and enable it.
3. Add recipients
Next, add the recipients (see step 4 above for details)
4. Customize your email
With Mail Merge, you can send emails that feel personal to the recipient. You can email several recipients simultaneously while preventing them from knowing who else is receiving the same email.
After you’ve added your recipients, type a new message. To see a list of available merge tags, you can type “@”. To select a merge tag, press Enter.
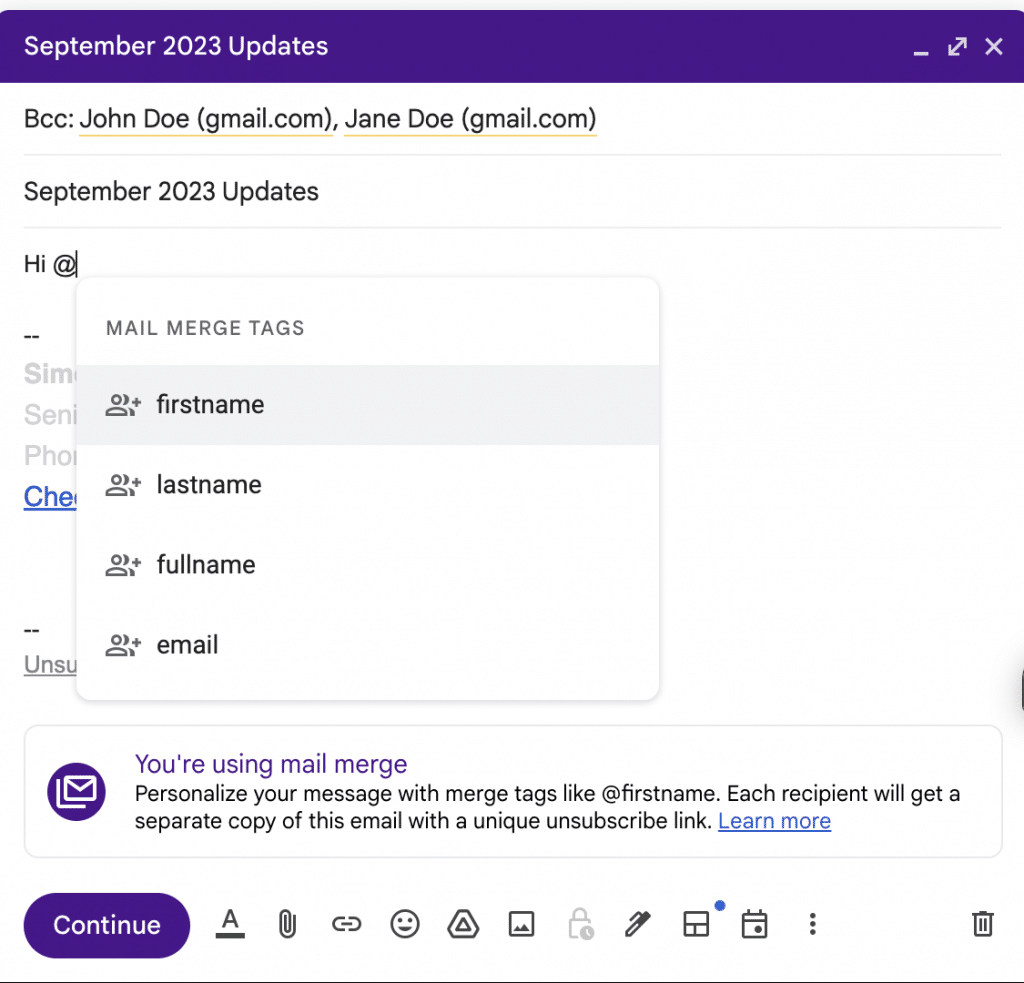
🥇 Much like the multi-send feature, every mail merge email automatically includes a unique unsubscribe link for each recipient. If recipients choose to unsubscribe, they’ll be excluded from any subsequent mail merge emails you send out.
3️⃣ Use a Gmail extension
While Gmail is robust on its own, you sometimes need more horsepower, especially if you need to send mass personalized emails.
Third-party extensions have emerged to fill this gap by offering advanced features and capabilities tailored to bulk emailing needs.
In this section, we’ll delve into some of these extensions that seamlessly integrate with Gmail, enhance its potential, and streamline the mass email process.
Here are a few of the best tools to send mass emails in Gmail.
GMass: A popular choice for Gmail users, GMass provides features like bulk emailing, scheduling, open and click tracking, and automated follow-ups.
Yet Another Mail Merge (YAMM): Integrated with Google Sheets, YAMM lets users personalize mass emails and track open rates. It’s an excellent option for those who manage their recipient lists in spreadsheets.
Mailmeteor: Similar to YAMM, Mailmeteor allows users to personalize and send mass emails directly from Google Sheets. It emphasizes privacy, which ensures that only the sender can access the email content and recipient data.
NetHunt: Turns your Gmail into a customer relationship management (CRM) system. It’s not just for mass emails but also for organizing customer data, tracking email campaigns, and setting follow-ups right within Gmail.
How to use suggested extensions to send bulk emails
Unsure how to navigate the extensions mentioned above? Fear not; they’re user-friendly. Here’s a straightforward guide to harnessing popular extensions for sending a mass personalized email through Gmail:
🔸 Prepare your contact list: Create a list of Gmail contacts in Google Sheets.
🔸 Install your extension: Click on “Add-ons” in Google Sheets and add your chosen extension.
🔸 Craft your message: Compose a new email template to tailor the content to your audience.
🔸 Preview your email: Before you send it off, always preview the test email to ensure everything looks the way it should.
🔸 Send away: Once satisfied, hit the ‘Send’ button.
How to Send Bulk Emails in Gmail without Being Blocked
Ensuring your emails land in the inbox and not the spam folder is crucial for effective email communication. Here are some best practices to help your emails get through Gmail’s spam filters:
✅ Maintain a clean email list: Regularly update your list by removing inactive or bounced addresses. High bounce rates can trigger spam filters. Also, don’t buy email lists. A purchased email list may provide you with access to a massive database of email addresses, but it rarely results in any leads.
✅ Get permission: Always obtain explicit consent before emailing recipients. Double opt-in methods, where subscribers confirm their subscription, can improve your reputation.
✅ Avoid spammy content: Stay away from all caps, excessive exclamation marks, or words commonly associated with spam such as “free,” “buy now,” or “prize.”
✅ Balanced image-to-text ratio: Emails that are heavy on images and light on text can raise flags. Always ensure a reasonable balance between text and images.
✅ Provide a clear unsubscribe option: Always include an easy way for recipients to opt out of your emails. This adheres to regulations and reduces the chances of being marked as spam.
✅ Stay compliant with regulations: Follow guidelines set by laws like the CAN-SPAM Act or GDPR. This usually involves that you provide a physical address in your emails, besides a clear method to unsubscribe.
Final Thoughts
Reaching your target audience effectively through mass emails from Gmail is not just a possibility—it’s a strategy waiting to be mastered!
With our guide’s insights, you’re better equipped to send mass emails in Gmail and ensure your emails find their intended inboxes rather than being sidelined.
To truly elevate your email marketing and make it resonate, delve into tools like Hyperise for advanced personalization. Your emails can be much more than just generic messages; they can become memorable experiences for your recipients.
Last Updated on October 2, 2023