Being able to reach-out to your prospects across multiple channels can significantly help drive engagement and conversions.
One strategy that has consistently worked here at Hyperise in our own outreach, is Personalised emails on LinkedIn, to automate a thank you email, to be sent out when making a new LinkedIn connection.
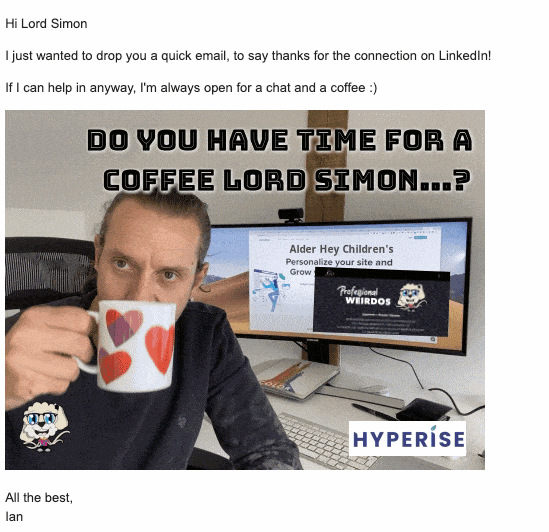
Of course we don’t just sent a standard email, but a hyper-personalised email, with personalised image and even a little easter egg!
How to Send Personalised emails on LinkedIn Connection
Why this works
Not all of us are in LinkedIn all the time, many users drop in for short bursts, not to return for weeks. Email however, most users are in and out all day, so betting there attention there, especially now your name is familiar to them, can really help increase your chances of engagement.
Also as LinkedIn is a more conversational medium than email, we are slightly conditioned to act differently in the two channels. So including a CTA link in an email can often invoke a different response to one in LinkedIn.
Again there are many different ways users interact with these platforms, so being varied in your cadences gives the best option to hit the right person, in the right way for them.
Of course going multi-channel means being careful not to appear spammy, so always deliver delight and value first…
As you can see from the email example above, we go with the strategy of a simple thank you for their connection and an offer of assistance in any way. This helps remove any connotations of being salesy or spammy.
However what we do do, is add a little easter egg, making the image clickable, and when clicked, taking them to a personalised landing page, with personalised video and personalised CTA to book a call.
Adding this non visible, or even referenced CTA in the email, removes the negative connotations of it being there, but as our stats show, over a third of recipients opening the email click in the image.
This is mostly likely because we’ve been conditioned to expect images to be clickable, even without visual indicators, eg how many website logo’s have you seen that are not clickable to the homepage?
How to implement this yourself
Spoiler Alert: to achieve this, we’re using three different tools, if you don’t have Expandi, Integromat (or Zapier) and Hyperise, then there is going to be some additional cost to achieve this!
Step One:
For the purpose of this guide I’m using Integromat, you could also use Zapier if you prefer, but as Integromat is about quarter of the price of Zapier, I prefer to stick with this 🙂
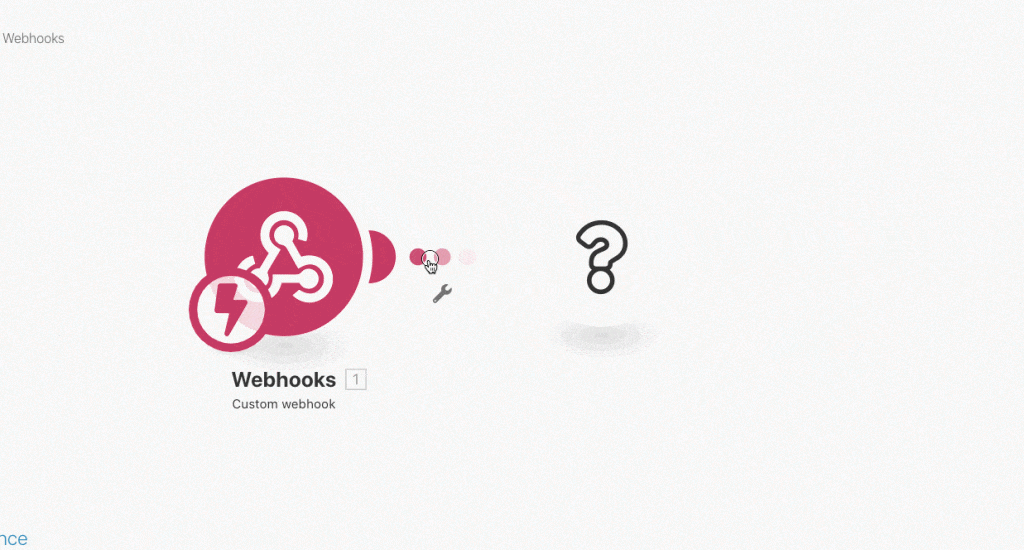
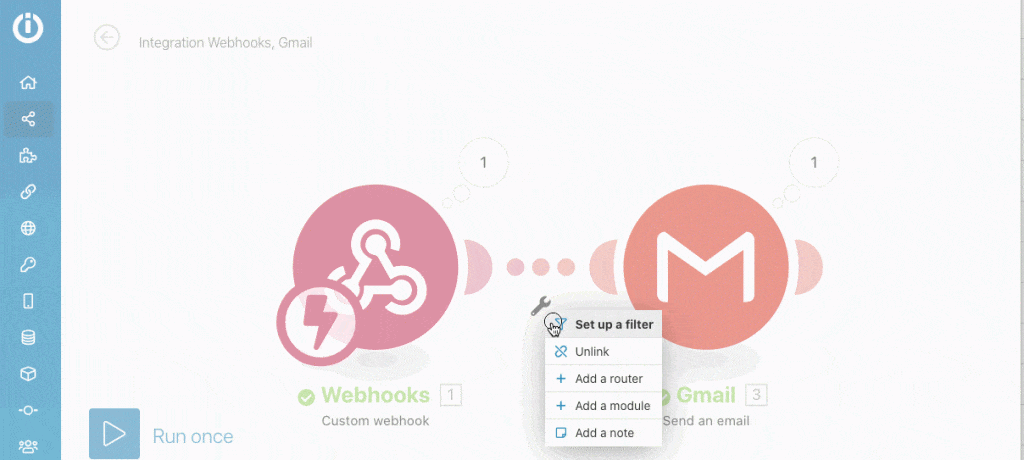
Create a new Scenario in Integromat, select the starting module as a Webhook.
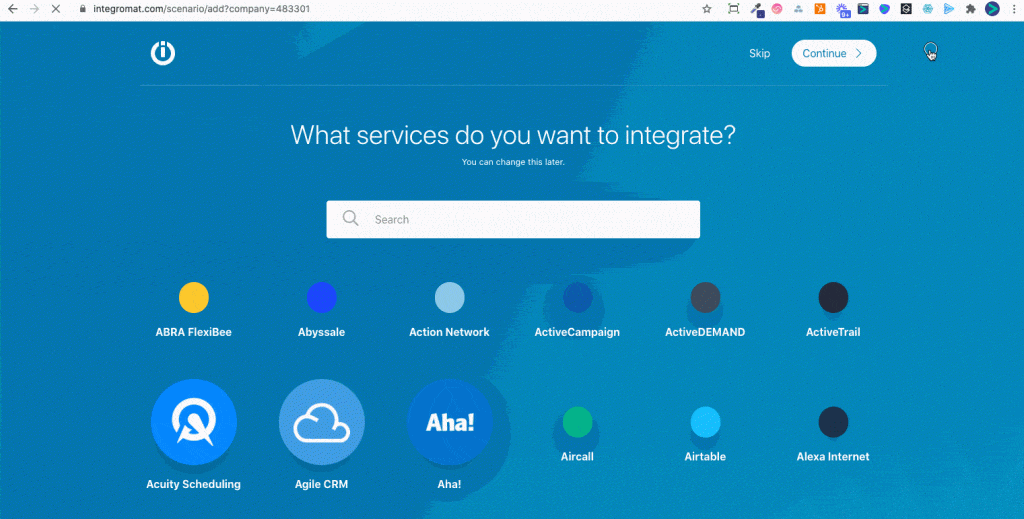
Once the Scenario is created, select the Webhook option, and give it a meaningful name (ie in this case Expandi, as that is what we’re linking to). Now finally copy the webhook address provided

Step Two:
Now you have your webhook URL, head over to Expandi and set it up there…
Go to the Webhooks section, select add, then make sure to select “Any Campaign” and to trigger on “Connection Request Accepted“, then paste in the webhook URL copied from step one.
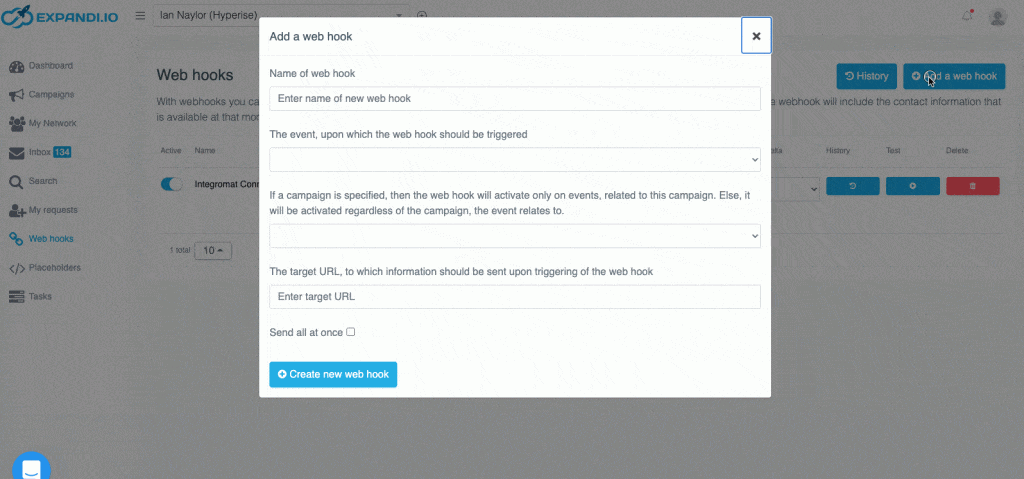
Once you have completed the webhook settings, send a test event, which will push some example data to Integromat, so you have the available fields within your email.
Step Three:
Now we can add a second module, that will send the email for us. At this point you could add a CRM or email platform integration, and send the prospect to there, and then send the email from an automation trigger in that platform.
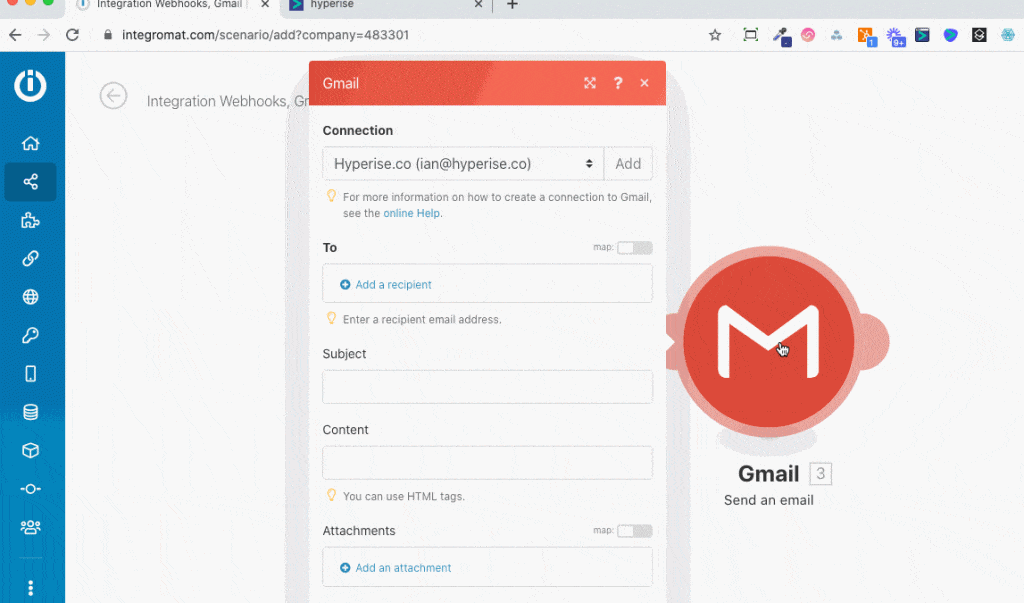
I prefer to keep things simple, so I send the email direct from Integomat, they have both a standard SMTP email client module and a GMail module.
You can now define the email content, adding in personalisation tags and images as you go.
Step Four:
Now we can add a Hyperise image to our email, first head over to your Hyperise account and select the image you want to use, add the Integromat Email integration and copy the image code.
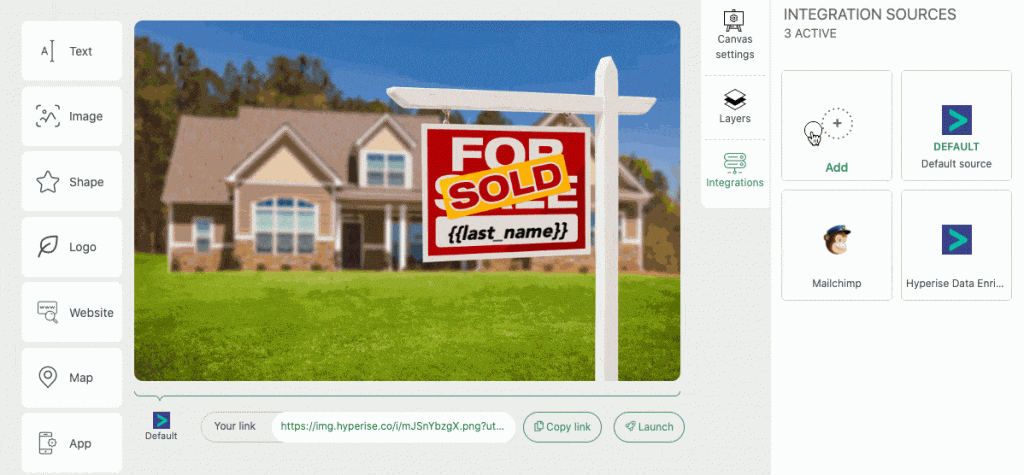
Once you’ve copied the image URL, head back to Integromat, to add it to your email content.
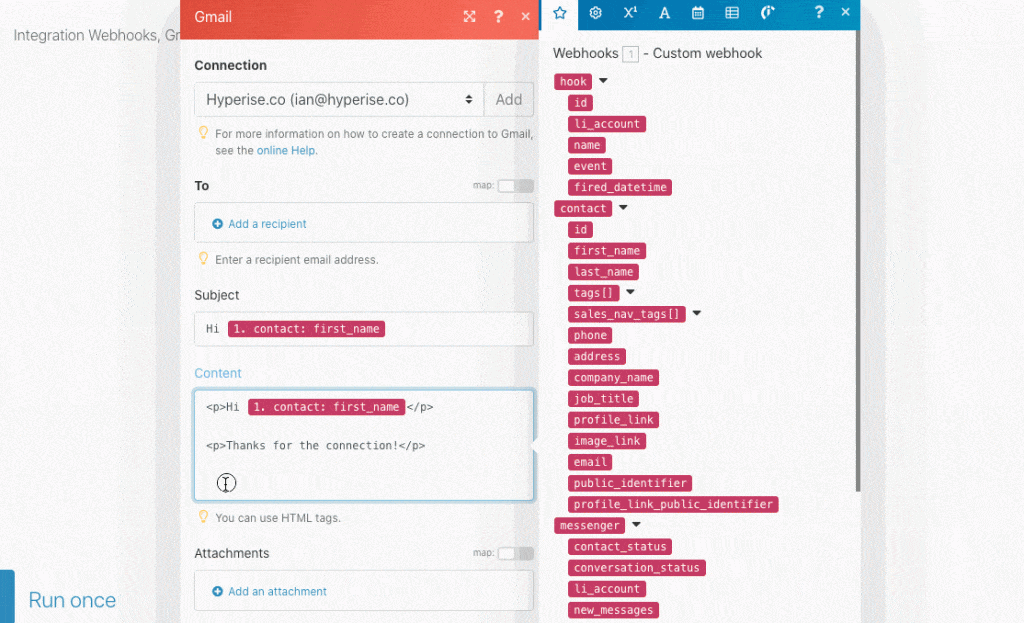
First paste in the image code copied from the previous step, into the email content area, now add the tags needed for the image, from the list of data options sent from Expandi. The image code will show all the required data fields needed to complete the personalisation.
Step Five:
Expandi does a great job of pushing lots of data from the prospects LinkedIn Profile, including email when it’s available. When it’s not available you have two choices, either filter those out that don’t, or go hunting for their email somewhere else.
Personally I prefer to only use email when they prospect has provided it, so I set a filter as below, otherwise add another module like hunter.io between the webhook and email to find the prospects email using there fullname and company name.
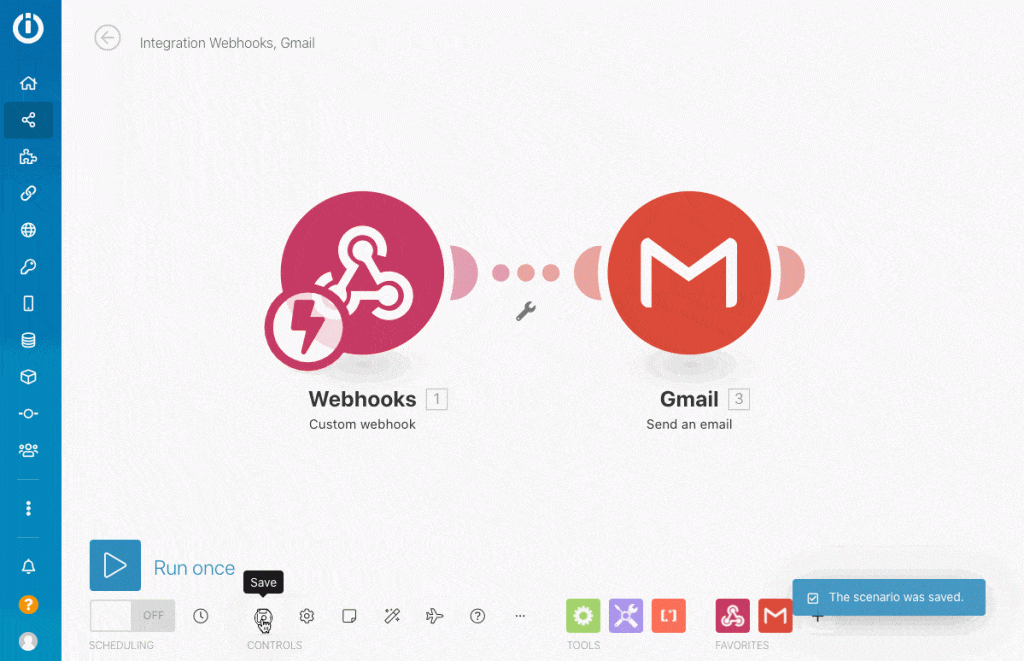
Step Six:
Final step is to save and turn on your new Integromat automation Scenario. Once done, thats it! Totally set and forget, now each new connection you have on LinkedIn, who has an email available on there profile, will get a lovely personalised welcome email.
Last Updated on May 7, 2021